|
|
|
The last
step is to tweak various settings to make the machine function properly.
If you did not disturb too many adjustments during disassembly, this should
not be too hard. It took me a bit more than a couple hours of fiddling
to get everything back in shape, but it could have been a lot worse.
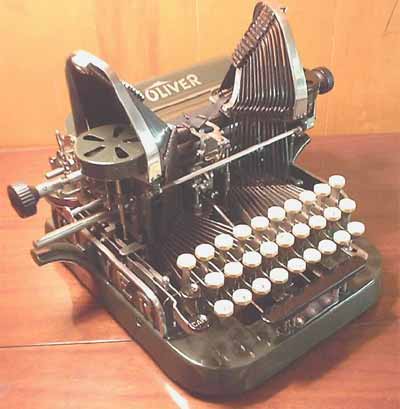
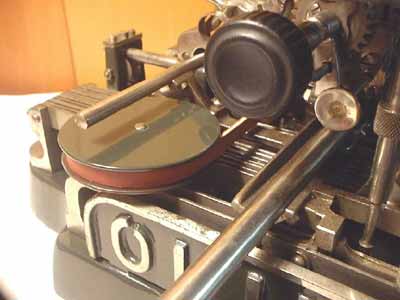
Calibration suggestions that follow are based on the mechanism found on my machine. If the underside of your machine more resembles an Oliver 3, functions of the various parts will be similar, but the method will have to be adjusted to suit the design. The activation of the ribbon transport and triggering of the escapement is a delicate dance involving two things, the adjustment of the "hook" connecting the universal bar to the space bar levers, and (on my machine) the setting of the two "mystery springs" arching up under the universal bar from below. These springs are evidently there to cushion the blow of the type bars as they reach the platen, and their adjustment serves as a form of "touch control." The only time they are activated is when the universal bar contacts them at the end of a type stroke. I found that the machine feels rough and clattery when these springs are adjusted down until they are out of reach of the universal bar, but the touch gets excessively heavy and escapement becomes unreliable when they are too high and are adjusted too tightly. I ended up setting their height so that the universal bar encounters their resistance when the type slugs are about one centimeter above the platen, and then setting the tension (via the bridge screw on the bottom of the frame) to give the best feel. Of course, not having access to the wisdom of the original designers, my approach is strictly trial and error. I encourage you to play with these settings yourself and come to your own conclusions. Once the mystery springs are set, adjust the hook so that there is a small degree of constant tension between the universal bar and the space bar levers. Too much tension here and the escapement dogs are pulled up so far that they do not fully engage the teeth on the wheel. I think this could lead to premature wear and even chipping of these critical parts. This also reduces travel for the ribbon transport pawls and can put this system out of action. On the other hand, too little tension on the hook results in a sloppy space bar that will not trip the escapement. You want reliable escapement operation and ribbon movement from both the keys and the space bar with the escapement dogs fully engaging the wheel teeth when at rest.
Aligning
the type involves several steps. First, you have to be sure that the
typebars from the left and right sides are both hitting at the same printing
point. With the adjustment rod between the two type towers loose, prevent
the carriage from moving by running it all the way to the left until it
hits the margin stop. Then type a variety of characters from the left
and right sides and see if they print in the same place. At this stage
it is necessary to type a number of characters because any one of them
may be misaligned all by itself, and what you are looking for is a pattern
over a variety of letters. If the left-side letters print consistently
to the left of the right-side letters (and this is probably what you will
find, since an adjustment rod such as the one used here is designed to
pull and not push), draw the two type towers closer together by tightening
the rod. Once you have a common printing point for the two sides, it is
time to adjust individual letters. Unless the type towers got whacked
badly and the typebars dont even nestle into their resting positions
properly, chances are you are going to have some (hopefully many!) letters
already in pretty good alignment. Go right across the keyboard and strike
every letter four or five times. Look first for consistency in printing
the same letter. If the machine cant even print the same letter in the
same place four or five times in a row, you probably need to look at the
little adjustment screws on the typebar retainers. Jiggle the typebar
up, down, and sideways. If it is loose, tighten the adjustment screws,
either on the top of the typebar retainers or the tiny little ones on
the back of the typebar bearing plate, until play is reduced without introducing
a bind. The good news is that you can get to most of these screws fairly
easily by swinging typebars out of the way, but the bad news is that getting
them to turn is another matter. A badly rusted retainer, or screw slots
that have been damaged by previous ham-handed mechanics may present some
problems.
Of course,
NONE OF THIS CONSTITUTES A GUARANTEE FOR ANYTHING YOU MAY DO. Use
your own judgment. When you think you are done, type the following non-sentence:
|