|
On
Decals and Pinstripes |
||
|
Good
decals are a must on any old typewriter. They can be ornate pieces
of illustration. But sometimes they wear off or are damaged in other
ways.
Replacement parts can be found, but you'll see that finding parts with good decals on them will not be easy. Obviously, we'll all use the best decals on the machines in our own collections. And obviously, parts with decals are most wanted and most asked for. 2. Restoring the original Robert Nelson provides the following method to restore gold decals on machines, using amber colored shellac. Warning: Shellac is very difficult to work with as it dries almost instantly. Shellac is a natural lacquer, secreted by an Indian tree louse (ok, you didn't ask, but this is one of those things you should know). Shellac can be obtained through specialized paint shops. The amber kind is rare. If you live where I live, you'll have to ask a friend in the United States to send you some. (Thanks, Robert!) For more information on Shellac, check out the producer of Bullseye shellac.
Possibly, the piece will now
be so shiny, that it doesn't fit the rest of the machine anymore.
In that case, polish it with clear coat polish compound to dull
it a bit.
They are all available. I have put a number of them in an Etsy sthop There are direct links to them in the list. For the rest: Just drop me a line and tell me which you need. If what you are looking for is not on the list, you can still ask. If good examples are available I can make them for you. Varnish Applied
Decals and Silk Screening To make a decal as it was done originally, a special
paper is required which has a tissue layer on a peelable back sheet.
A mirror image of the decal is silk screened or printed on the tissue
side. When ready to apply, the image area is sprayed with varnish.
This is absorbed by the tissue paper and tends to dry quickly, but
on the decal the varnish dries more slowly. When tacky, the image
side is placed down on the surface where needed. After the varnish
has set, the backing paper is peeled off. What's Of course, a silk screen can be used to apply an image directly
on to a typewriter. However, this is only recommended for flat surfaces.
|
||
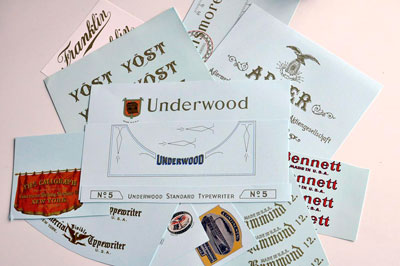
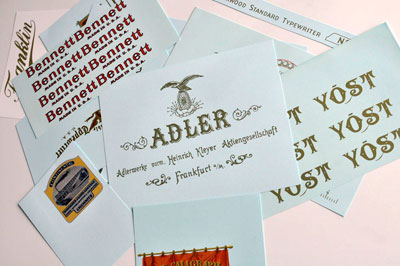
Some of these decals are for sale through my Etsy shop. The links lead to their individual pages.For the others, or for multiple orders (50% off every second decal) and custom decals, drop me a line.
Adler (Kleinadler1 + 2)
Adler 7
Adler 7 (Gropius-design)
Adler 7 (1930)
Adler 15
Adler 30
Allen
Amata
American 5
American Index
American (keyboard)
AmericanWriting
Machine Co. Logo
Armstrong
Barlock
Barlock 2
Bennett
Bing
Bing Student
Blickensderfer 5 (early)
Blick Electric
Brooks
Burkhardt
Carmen
Caligraph 1,2,3,4
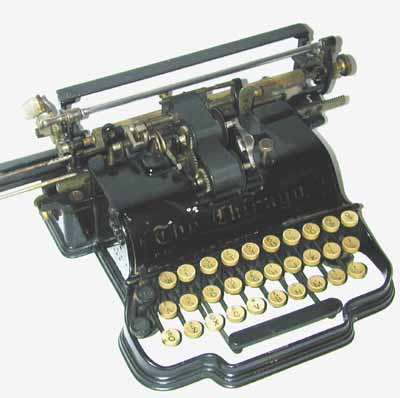
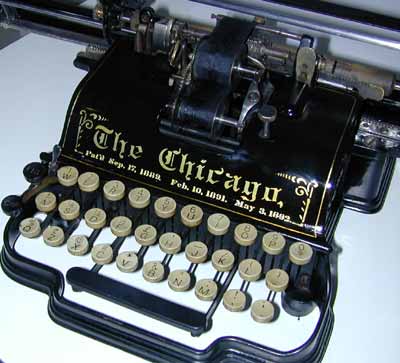
Chicago
Commercial Visible
Continental (several)
Continental-Silenta
Corona 3
Corona Special
The Courier
Crandall (New Model)
Dactyle
Densmore 1
Densmore 4
Diamant
Eclipse
Edelmann
Emerson
Empire 1 and 2
Erika-Naumann
Erika 5
Fay-Sholes
Fitch
Fox
Fox 3 (set)
Fox 23/24 (set)
Franklin 7+9
New Franklin
Frister&Rossmann (Caligraph)
Geniatus (+index card)
Germania 5
Hammond 2, 12
Hammond Multiplex
Heady
Helios Klimax
Hermes 2
Hermes 2000
Hermes Media
Ideal (early)
Imperial B
Imperial
D
Imperial Good Comp. T
Japy 5
Junior
Kanzler 1, 3, 4
Keystone
Lambert Saturn Logo
L.C. Smith 2, 8
Manhattan
McCool
Mercedes
Merritt
Mignon 2 (complete set)
Molle 3
Monarch 2/3 (set)
National
National portable
Noiseless (+portable)
North
Oliver 2, 3, 5-6, 9, 12
Orga Privat
Olivetti M1, M20
Perkeo
Pittsburg 10
Plurotyp
Polygraph
Postal (and La Postale)
Rapid
Remington Standard 2
Remington 6,7, 10-early
Remington 10 (late) 12
Remington Portable
RemingtonRand Port.1/5
Rex Visible
Rheinmetall
Rofa
Rover 2000
Royal 10 (old and late)
Royal Flatbed 1 & 5
Royal Portables
Ruf
Ruf Portable
Salter
Senta
Sholes visible (logo, name)
Sholes & Glidden
Smith Premier 1,2,4,10
Smith Premier coverStandard Folding
Stoewer
Stoewer Elite
Stoewer Record
Sun dogbone
Sun Standard 2
Torpedo 4, 5
Triumph Perfect Visible
Underwood Portable
Underwood 3
Underwood 5
Underwood 5 (with pinstripes)
Urania Piccola
Voss-Privat
Voss 24
Voss Klein
Wagner Underwood
Waverley
Wellington 2
Williams 1 and 2
World Index
Yost (New Yost)
Yost 4 (paper tray)
Yost 10 (paper tray)
|
|
||
|
|
||