|
Applying
the Adler 7 decal |
||
|
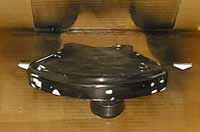
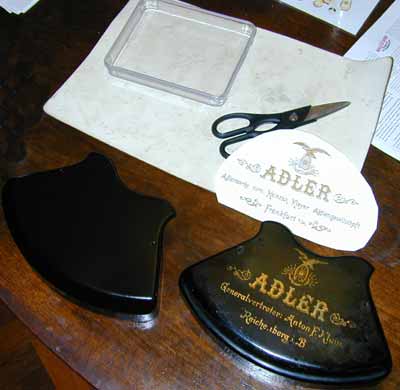
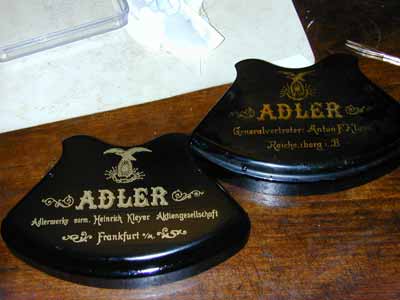
You can use this page as a guideline for the application of waterslide decals. The example here is the spectacular eagle decal on the Adler 7. In the column on the right you'll find some samples of decals that are available through this website. Mail me for details. 1. Strip the original part of remainders of the original decal. Sand it and repair damages.
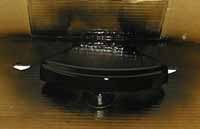
3. Apply the decal.
4. I cut this decal into three pieces, because it is so big. First I applied the eagle, then the Adler trademark and then the two lines with the name of the seller. Put the decal in water and let it soak until the decal comes loose. Carefully lift it from the water (on the paper) and let it slide onto the piece. Adjust the position until it is in place exactly. Now soak excess water off with a tissue. Be careful not to move the decal when you do this. Gently rub your flat fingernail over the decal, to remove water
that is still under it and to straighten in out. Use the tissue
again to soak the water off. 5.When wet, the decals are quite vulnerable. They tear easily. Once dry they are pretty tough, but not tough enough to withstand use of the typewriter. If you want to use the machine, you will have to coat or even embed the decal in plain lacquer. To clearcoat decals use Testors Gloss Cote #1261 or Dutch Boy Gloss Spray Lacquer #S7019 or Ace Instant Drying Lacquer #17027. You can usually get this from hobby supply stores. These are non-aggressive lacquers. Most other lacquers and sprays will wrinkle up the wax-based ink in the decal. The quick way: Just coat the decal, cut it out as closely as you can and apply it. Let dry and leave as is. This avoids the over-restored look.
|
||