|
At this
point, the things are ready for cleaning.
If you are using the box system that I recommend for dividing parts into
subgroups, the number of parts in each of the five boxes (painted parts
are another category) will be about right for a single cleaning session
(one to two hours, in my experience). Dont try to do it all at once.
As much as I love working on these old beauties, cleaning parts is my
least favored activity. Once I get the castings painted and ready to receive
parts, my usual approach is to clean whatever box of parts is needed next
and then proceed to reassemble them. This breaks up the boredom. Use your
favorite cleaning technique.
On the mainframe, most of the crud is going to accumulate on the top surface.
Often, little dirt is found on the underside, and this is why some of
the underside stuff can sometimes be left in place. Air blasting, scrubbing
with solvents and toothbrushes and blowing out the nooks, crannies, and
bearing surfaces with solvent will often be perfectly adequate. Please
note that I do not advocate the use of toxic chemicals.
If you are going to use something like carburetor cleaner or engine starting
fluid, be safe. ALWAYS use these things OUTDOORS and ALWAYS
stand UPWIND of the operation. Starting fluid (which does a sterling
job, by the way) is mainly ether, a surgical anesthetic. DO NOT
breathe the fumes!
Brass and steel wire brushes and plenty of steel wool are the main materials
I use in combination with responsibly-used solvents and cleaning agents
to complete the job. When parts are clean, unpainted parts were sprayed
with protective oil and things that needed paint were carefully degreased.
During the disassembly and cleaning process, I identified a number of
parts that were missing, damaged, or shabby, and made use of a little
ingenuity, as well as good friends on the typewriter lists, to replace
them. I would like to extend a sincere thanks to Paul Robert for the decals,
to Peter Weil for key tops, typebar comb, space bar, and several other
small parts, and to Bob Aubert for new rubber feet and some good advice.
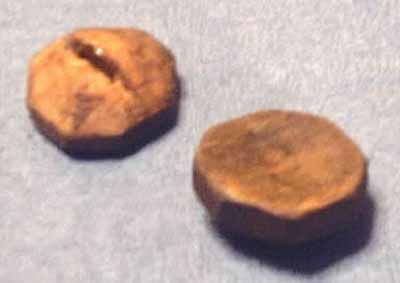 |
| 10.
Wood key tops that someone made to replace missing originals |
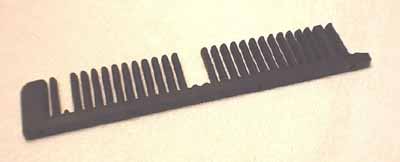 |
| 11.
Original cast non-metallic key comb with missing teeth that was replaced
with the comb from an Oliver 3. |
All leather components (typebar rest cushions, space bar rest cushion,
and carriage strap) were replaced as well. Five of the key tops on my
machine were missing, and someone long ago had fashioned wooden replacements,
obviously spending a lot of energy trying to do a good job (See Photo
10). Replacement key tops from Peters Oliver 3 parts machine match beautifully.
Nevertheless, all the key tops were showing their age. They all had tiny
cracks crisscrossing their surfaces and appeared to be in danger of disintegration.
So after cleaning with Formula 409 and a toothbrush, I sealed the surfaces
with clear polyurethane to increase their life expectancy. This also restores
some of what I imagine was their original luster. The fact that the machine
had lost five key tops over the years also prompted me to put a drop of
super glue onto the base of each one, new and old, to secure it to the
key lever.
Another problem was the key lever comb. The original (See Photo 11) was
a plastic (for lack of a better word) casting. It had three teeth broken
out of it, and for a while I entertained the idea of repairing it with
glued and screwed-in replacement teeth carved from new material, but in
the long run practicality won out and I replaced it with the comb from
an Oliver 3. The slot spacing is identical. One hole had to be drilled
in the replacement comb and the whole thing was angled to the rear slightly
to bring the wearing surfaces of keys and comb together, but with the
machine reassembled nobody will ever notice the difference unless you
tell them.
For historical purposes, of course, this means the machine is no longer
"original," and I think it is important to retain a record of any such
changes and also to keep the original defective part(s) so that if the
machine changes hands the new owner will know what was done. All original
parts that were replaced in this project (including the homemade wooden
key tops) are in a labeled plastic bag that will follow the machine from
now on.
The single ribbon cover that came with this machine may not have been
original either. It is identical in design to the covers used on the models
3 and 5, and while I have seen another model 2 pictured in Darryl Rehrs
book with the same covers, that is no guarantee of originality. I have
been told that the model 2 should actually have covers with round holes.
Until something like that shows up, however, I will continue to use the
one I got with it, along with another one like it salvaged from a model
5 parts machine.
Since
repainting was part of my project, duplicating (or at least approximating)
Oliver green was the next step. If you can get it done, a computerized
paint match by an auto paint supplier is the best bet. This was not possible
for me, so after priming the parts with Krylon primer, I approximated
the color with two parts Krylon High Gloss Hunter Green (KDH6118) to one
part Krylon High Gloss Leather Brown (KDH6119), appropriately thinned
for spraying. I give this paint formula ONLY as information about what
I did, NOT as a recommendation for your own color. I cannot guarantee
that you will be happy with it. It is fairly close, and I believe Oliver
did vary its own paint formula over the years, but I encourage you to
experiment on your own with paint until you find something that satisfies
you. If you lack spray painting equipment, most auto paint suppliers and
even hobby shops will have an ingenious little device made by Preval,
consisting of a compressed gas power cartridge and a glass paint jar.
Fill the jar with your paint and proceed as with a spray can. It works
great! I was able to do the entire machine with one gas cartridge. Once
the paint dried thoroughly (Rule of thumbif you can still smell it, its
not ready), I went over the painted parts with polishing compound and
auto wax until I got the appearance I wanted.
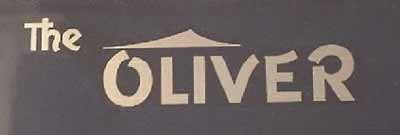 |
| 12.
Oliver 2 decal by Paul Robert |
Paul has published several articles on this site detailing how to go about
perfecting a finish, and I cannot offer any better suggestions than his.
Locate any bearing holes or bearing surfaces that may have been painted
over, such as the holes that the ribbon shafts go through on the frame,
and the slot that the carriage rail assemblys centering block rides in,
and clean them off. Also, with the painting done, now is the time to apply
new decals. My Oliver 2 only has one decal, on the paper table, and I
used an excellent decal produced by Paul for this purpose (Photo 12).
And so,
it's time to reassemble: 
|