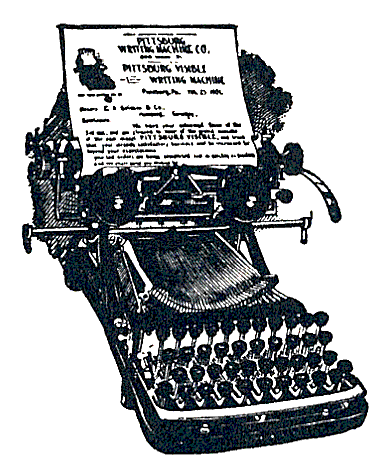
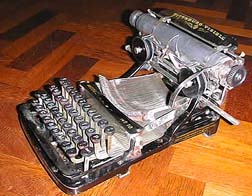
The Pittsburg 10
The Pittsburg 10 was based on the earlier Daugherty, the
first true visible front stroke machine with a four bank keyboard. It
was the beginning of the end of typewriter development, but it was not
a very good start. If you look at this model with its very long type bars,
the problem with the machine seems almost obvious. It is virtually impossible
to align the type with such long, drunken type bars swinging up to the
platen. And so, the Pittsburg was a nice visible writer, but the text
it produced was less than perfect. For collectors, the PB10 is a dream
of a machine. The shape is beautiful with abundant nickel and lovely decals.
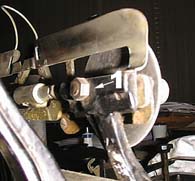
There was very little wrong with this particular machine: Both ring shaped margin stops and the screws at the end of the carriage rail were missing, and the main spring was broken, but everything else was there. Also, the decal on top of the type basket was damaged and needed to be replaced.
Therefore, this project is mostly a guideline for dismantling and cleaning the PB10. The pleasant part is that the machine comes apart quite easily.
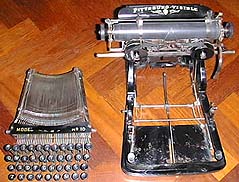
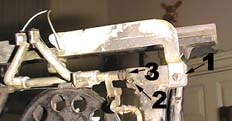
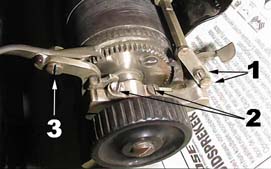
Undo the screws 1, 2 and 3, holding the paper bail, the platen and the carriage return lever. Do this on both sides of the carriage to remove the platen. The carriage now comes apart completely and you can remove the paper tray and all other parts for cleaning. I cleaned up the platen by lightly sanding it with 1000 enamel paper and thinner, to achieve an excellent result. All the nickel parts (on the carriage and on other parts of the machine) were buffed, using a Dremel with red buffing paste, after cleaning off dust and dirt.
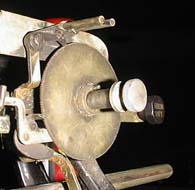
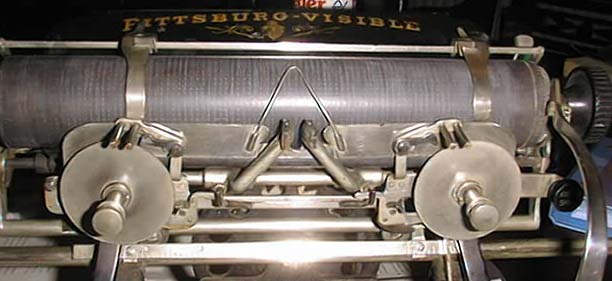
One of the most striking features of the PB10 is the nickel plated section in front of the carriage: ribbon holders, alignment section and ribbon reversal mechanism. This section also can be dismantled completely. To start with, remove both ribbon spools and the ribbon. -picture 1)