The Blickensderfer 5/6
Guidelines for disassembly by Rob Blickensderfer - 4
F. REMOVAL OF KEYLEVERS
A single keylever can be removed by itself To remove only one keylever:
1. Remove the bottom protector plate (this is step 2 above).
2. With the machine inverted, use small pliers to grab the appropriate spring near its end and move it rearward to disengage it from the slot in the frame. Then pull the spring free.
3. Loosen the 3 screws that secure the keylever retainer plate (same plate as in step 6 above) . Slide the plate just enough to allow the desired keylever to be removed. Slide the plate back in place and tighten the screws.
To remove all the keylevers:
1. Remove 28 springs, 14 each side, as above. Note, there are two additional springs, stiffer, near the center of the machine, on the segment arms.
2. Remove the keylever retainer plate (step 6 above) . With the machine righted, take out each keylever. For reinstallation, the order from left to right for a DHIATENSOR keyboard is D&ZHPIXWAFKTUG BLEVCNMQSYOJ$R
Further disassembly can continue: Remove the top slotted guide plate, 2 screws
Remove the front slotted guide plate, 2 screws
Remove the screw that holds the shift keys.
Assembly, from right to left is: shoulder screw, CAPS keylever, bushing, FIGS keylever, thin washer, frame.
Remove the shift pivot-arm if desired, 1 shoulder screw.
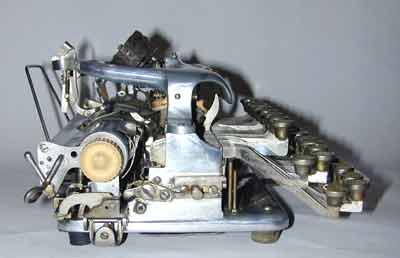
G. REMOVAL OF THE U BARS
The three U bars pivot on the same axle, a rod that runs the full width of the typewriter. It is wise to take a photo or make a sketch of these U bars to help in reassembly, which is a little tricky.
1. Remove the vertical coil spring that is attached in a small hole near the center of the machine.
2. Remove the springs from each of the two segment arms. These two springs are similar to the keylever springs, but stiffer and with a different curve on the end. The curved end hooks onto a rivet on the side of the segment arm.
3. Loosen the setscrew in the frame near each end of the rod.
4. Using a drift pin, drive out the pivot rod, and the U bars will fall out.
5. For reassambly, there is a thin washer that goes between the inside of the large pivoting frame and the inner U bar, one each side. A bushing, 1/8 inch long, belongs on the axle rod near the center. The smaller end of this bushing faces left and is where the spacebar lever fits on.
Now you are down to a bare frame and lots of parts. Clean and polish
the parts all you want.
END